Learning Hub | Maintaining Your Website
How To Use WordPress 101- Part 2/3
August 22, 2016 | Jon Teodoro

This is part 2 in a series. In the last article, we talked about how to log in to your WordPress website and how to change your password. In this article, we will cover User Roles.
How to set roles in WordPress
Roles determine what actions users are allowed to do on a website. Site owners can give users access to such tasks as writing and editing posts, creating pages, moderating comments, and more, by giving those users roles and capabilities. WordPress comes with six pre-defined roles: Super Admin, Administrator, Editor, Author, Contributor, and Subscriber. Anyone who is not logged into the site is considered an Anonymous user and is usually only granted the capability to read the website and make comments on posts.
Super Admins are reserved for multi-site installs. They’re basically network administrators, with access to the site network administration features and all other features.
Administrators have access to all the admin features within a single site.
Editors can publish and manage posts.
Authors can publish and manage their own posts.
Contributors can write and manage their own posts, but they cannot publish them.
Subscribers can only manage their own profiles and nothing else.
For a comprehensive list of the exact capabilities that each role has, visit the WordPress Codex (https://codex.wordpress.org/Roles_and_Capabilities).
Some plugins will add roles to your website. One example is WooCommerce, which is ecommerce software. WooCommerce adds two roles to your website: Customer and Shop Manager. By default, customers can only edit their own account information and view their past and present shop orders. Shop Managers can manage all settings within WooCommerce (including creating/editing products) and view reports. Other than that, they have general Editor capabilities.
Default Roles
When new users sign up for your website, they will automatically be granted a role. By default, users are assigned the Subscriber role when they sign up. You can change this default role by following these steps:
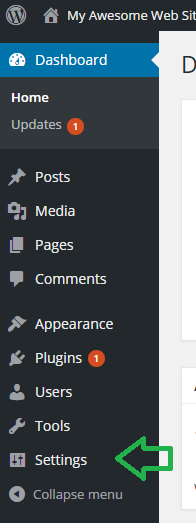
- Log in to your WordPress dashboard and click Settings.
- Scroll to where it says “New User Default Role” and choose the role you want new users to have from the dropdown.
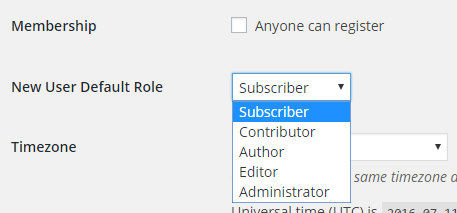
- Scroll all the way to the bottom and click “Save Changes.”
Changing Roles for Specific Users
If someone signed up for your website and was given the default role of Subscriber, but you want them to have the role of Contributor, you can easily change this in the user panel. Click on Users, then click on that user’s username. Scroll down to where it says “Role” and choose the role you want to give them from the dropdown box.
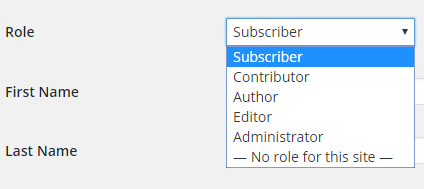
Scroll down to the bottom and click Update User.
Customizing Role Capabilities
In some cases, you will want to customize the capabilities of user roles. For example, you may not want authors to be able to delete their posts, or you may want to give contributors the ability to upload media files. If you want certain roles to have different capabilities than the default, you can download a plugin to allow you to manage your user roles and capabilities. One popular plugin is Capability Manager Enhanced (https://wordpress.org/plugins/capability-manager-enhanced/).
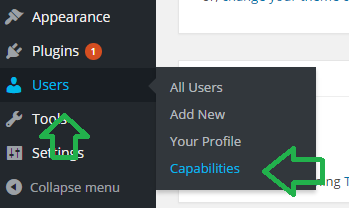
Once you have installed and activated the Capability Manager Enhanced plugin, you can access it by clicking on Users > Capabilities.
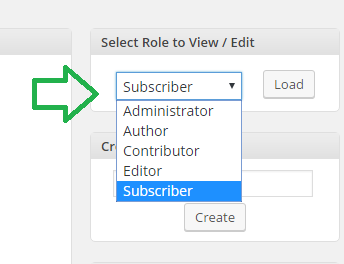
By default, the Subscriber role is loaded when you visit the capabilities page. If you want to edit another role, go over to the right hand side of the screen and click the dropdown under “Select Role to View / Edit.” Choose the role you want to edit, then click Load.
Once you load the role you want to edit, you can check boxes next to the capabilities you want this role to have. If I want to remove the ability for Authors to delete their posts, I would uncheck the box next to Delete Posts (see screenshot).
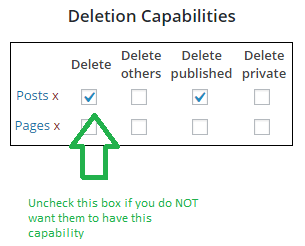
Once you have checked/unchecked all the boxes you want, scroll down and click Save Changes.
You can also create new roles with this plugin. On the right hand side, there is a box title “Create New Role.” Type in the name of the role you want to create, then click Create.
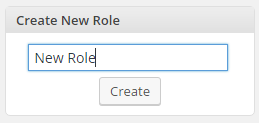
After you click create, you can grant some capabilities to your New Role. Check the boxes next to the capabilities you want the New Role to have, then scroll down and click Save Changes.
Capability Manager Enhanced is one of the simpler plugins for managing roles. If you have deeper needs, you can also try Press Permit Core Pro (a paid plugin), which gives you greater control, including the ability to assign users to single posts.